Semidedicated Seedbox
Starter's Overview and Guide
Your seedbox comes fully equipped to handle all your torrenting needs.
Xirvik effectively makes worries a thing of the past, your seedbox doubles as a HTTP proxy server!
This is made possible because you have your own static IP address, which is reserved for use by nobody but you!!
Your seedbox is capable of speeds up to 2000 Mbit (2 gigabit) per second.
Those lightning fast speeds in conjunction with the seedbox's fully featured client, rTorrent, ensure satisfaction and minimized troubles.
The best part about rTorrent isn't the versatility or the simplicity.
It's the variety, and ability to choose your preference.
Your seedbox, in particular, comes with 3 different front-ends/flavors of rTorrent.
Meaning theres something to like about rTorrent for everbody!
You don't need to pick just one, you can use all 3 simultaneously; as the torrents active on 1 front-end will be visible on the other 2 as well.
Lets start off by getting a torrent file, and initiatiating a download.
We will explain how to do this on all available front-ends, and then explain further controls and options.
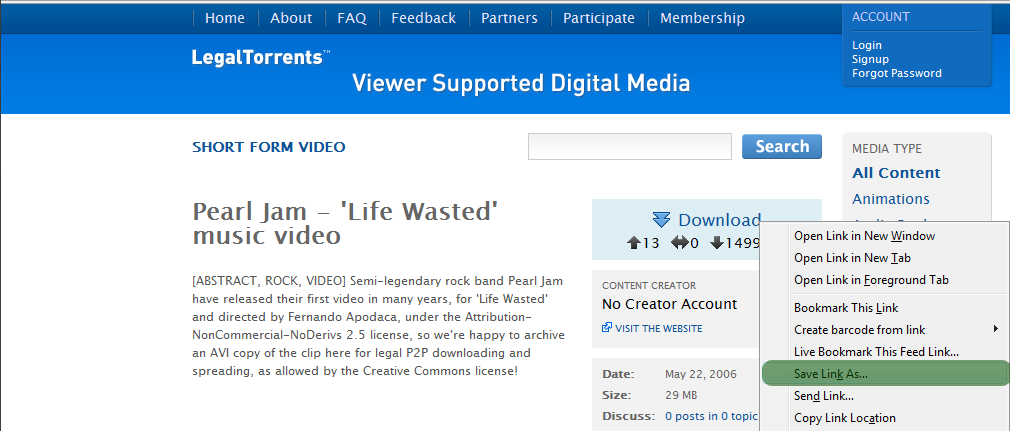
Open up a new browser or tab, and navigate to a trackers website. In this example we'll use www.LegalTorrents.com.
Find a torrent that you wish to download, right click the download link and select Save Link As.. or Save Target As.
You can save it anywhere you'd like, but your desktop will do just fine.
To actually download the file(s) we need to first pick a front-end/client.
Using your account information, emailed to you at the beginning of your subscription, let's go to your main server page.
In your browser URL/Link Bar input your server name “semidedi.xirvik.com” for example.
You will then be prompted to log in.
This information is also provided in your email.
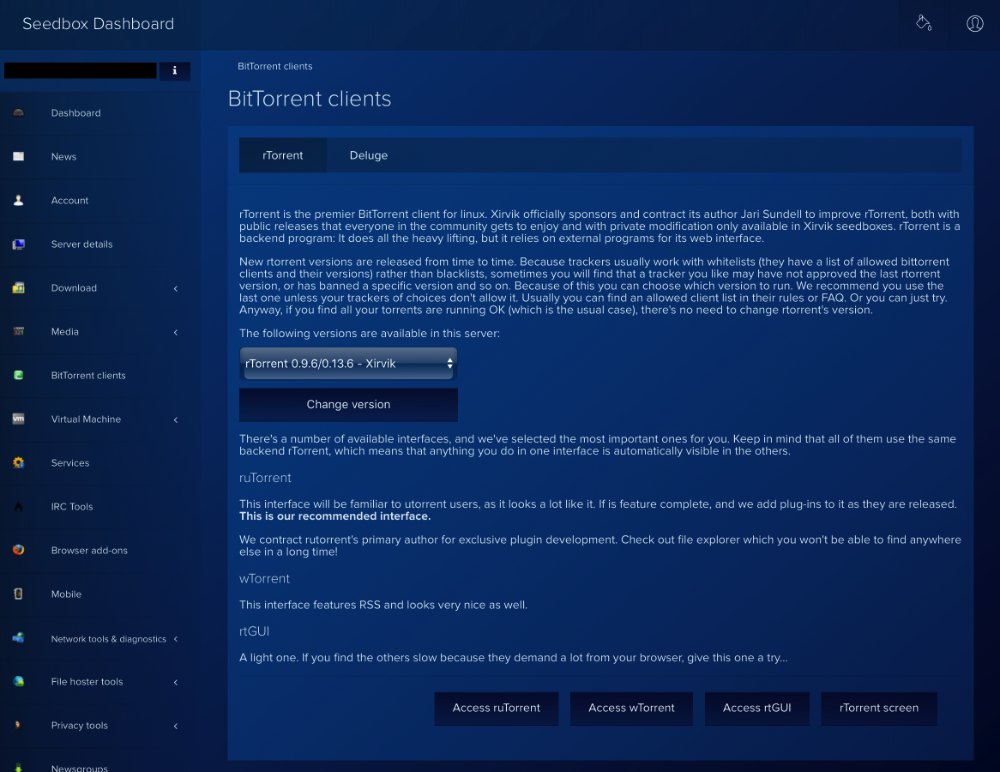
Once you're on your main seedbox server page you can choose from one of the 3 rTorrent front-ends/flavors.
You can try all of them 1 front-end at a time.
Or you may jump to the front-end's section by clicking on it either in the links below or on the image below.
There's ruTorrent (a uTorrent clone), wTorrent, and rtGui.
We'll begin the overview of rTorrent with ruTorrent.
Let's upload your first torrent!
ruTorrent
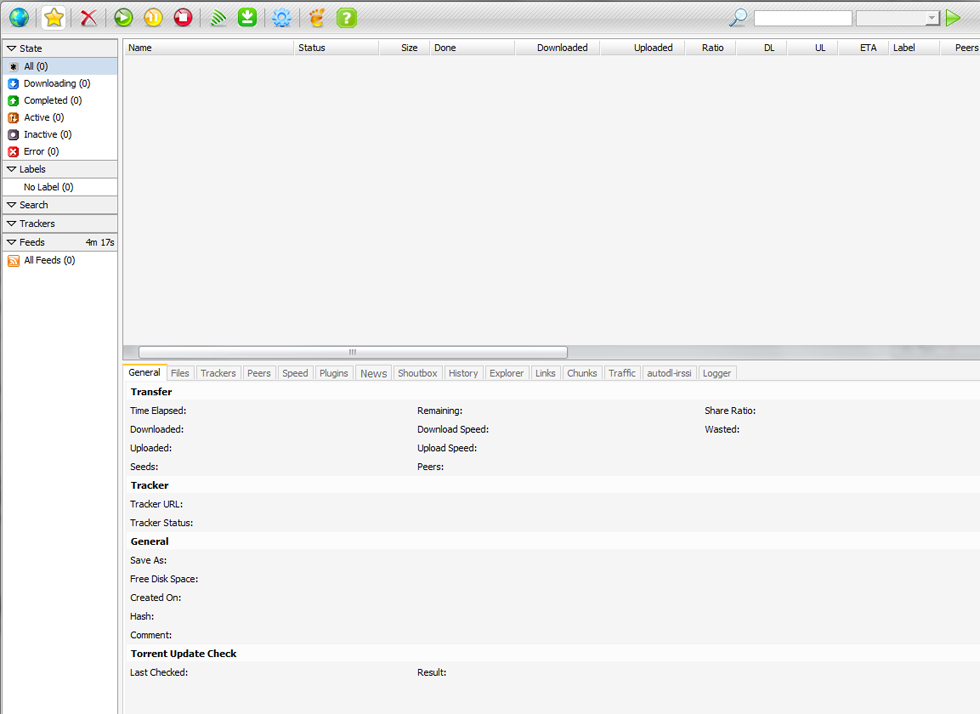
When you first open up ruTorrent, after the brief loading period, you will quickly notice one thing. It has the user-friendly and familiar looks of uTorrent!
In fact, it's so similar that most of you will be able to pick it up in a matter of seconds.
Heres quick overview of the toolbar.

The star allows you to create a torrent.
The X let's you delete a single, or many selected torrents.
Start, Pause, and Stop are quite self-explanatory.
Clicking any of these when a single or many torrents are selected will either Start, Pause, or Stop them.
Alternately you can right click 1 or many torrent entries for a similar list of basic controls.
The green signal is to Add an RSS feed.
The blue gear is the settings button.
The flag is to change the language.
The ? opens the About box..
Enough with the basic's, let's get the ball rolling.
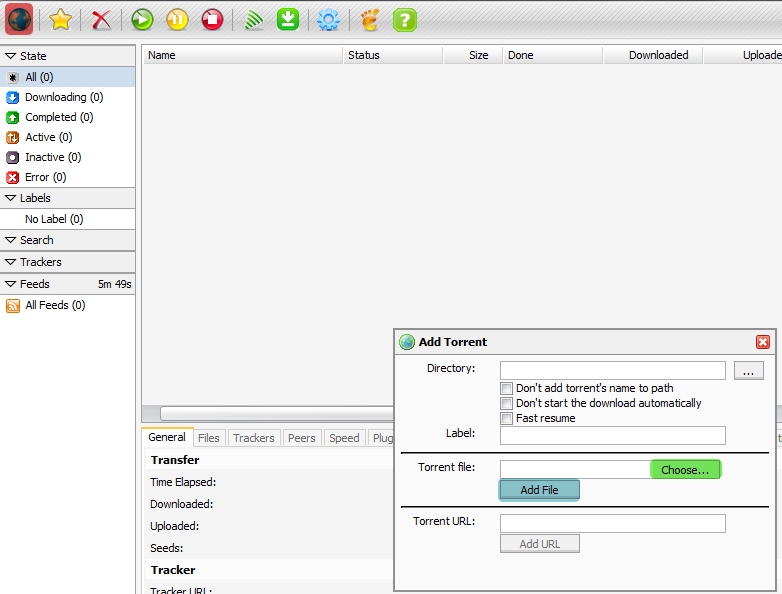
To add the torrent, select the Globe button in the top left corner (highlighted in red).
A small dialog box will appear.
Select Browse (highlighted in green) and locate the .torrent file we previously downloaded. Then select Add File (highlighted in blue) to begin downloading.
In a moment you'll notice a new torrent entry, and your file(s) will start downloading..
Looking towards the bottom of the screen in the General tab you will see some basic information about the torrent.
Going to the Files tab show's you all the files in the respective torrent entry.
You can individually choose which files to give priority and which to avoid downloading.
Let's check out the settings now. Hitting the gear button will open it up. 
Most of these settings won't do you much good to change.
It's recommended to not touch them unless you know what you're doing.
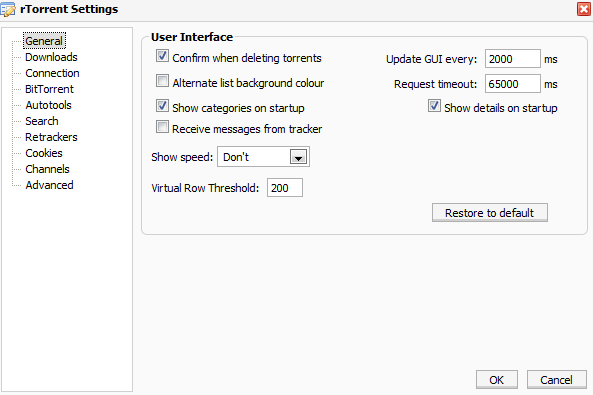
The General section has a couple of things that may be relevant to the average seedbox user. You may want to change the GUI update time.
Too low may cause slowdowns though.
Another setting you may be interested in is Request Timeout.
If you get systematic timeout errors you can try halving or doubling this number.
wTorrent
Let's give wTorrent a try.
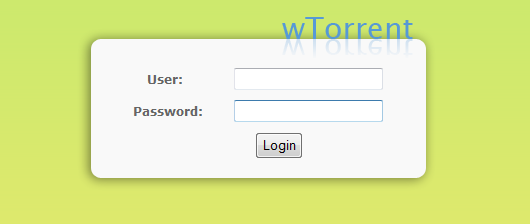
You may be asked to enter your username and password.
This information is the same as your general account.
Type in your information and select Login.
Now you'll be greeted with the minimalistic, but beautiful wTorrent client.
Let's click on Add Torrent up top.
(Highlighted in Red)
Select browse (highlighted in blue)
We'll be using the same torrent from LegalTorrents.com.
You can specify if you'd like the transfer entry to be in your Private Tracker section by checking Private.
Now hit Upload file.
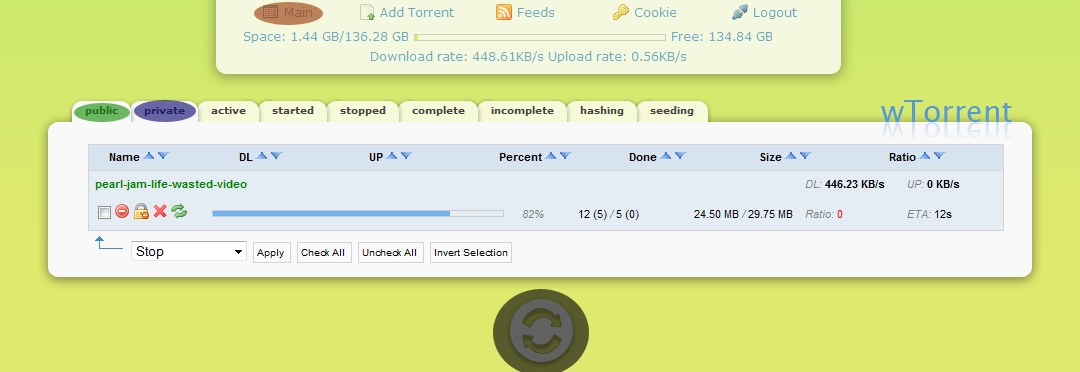
Hitting Main up top will let you see the transfer in action.
You may need to select private (highlighted in blue) if you chose that setting when adding the torrent.
It's important to note that you can refresh the page by selecting the refresh button (highlighted in black) towards the bottom of the page.
Selecting the check mark under an entry's title (highlighted in red) and then clicking the drop down menu at the bottom of the page will allow you to manipulate that torrent.
You can stop, start and erase.
Or recheck the hash to make sure you're not missing any pieces of your downloaded files.
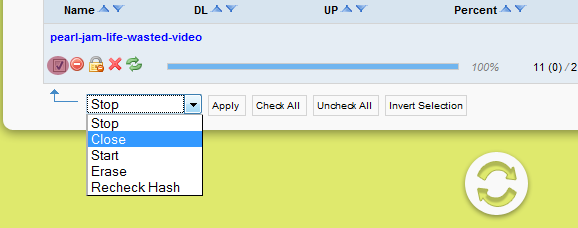
Once you've selected what you'd like to do hit Apply.
We can also click on the title of the entry to see more information.
You can change the priority of the entire torrent here.
The File/Folder section allows you to change the priority of individual files.
The last 2 sections show the tracker's and peers.
That's all for wTorrent!
rtGui
Next up is rtGui. Open it up from your server page.
As you can see from the main page, rtGui is a simple and no-frills web client. Luckily for us, it's quite capable!
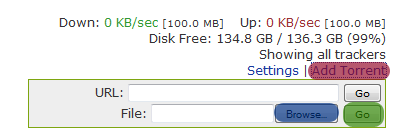
If you look to the upper right you'll see an Add Torrent button, let's click this.
As you might have been able to guess this opens up a section to add a torrent.
Simply hit Browse and find your file then hit Go!
Wait a few moments and it will be visible in the torrent entry list.
Don't worry if it takes abnormally long to be visible on the page, in the coming section you'll see how to change that setting.

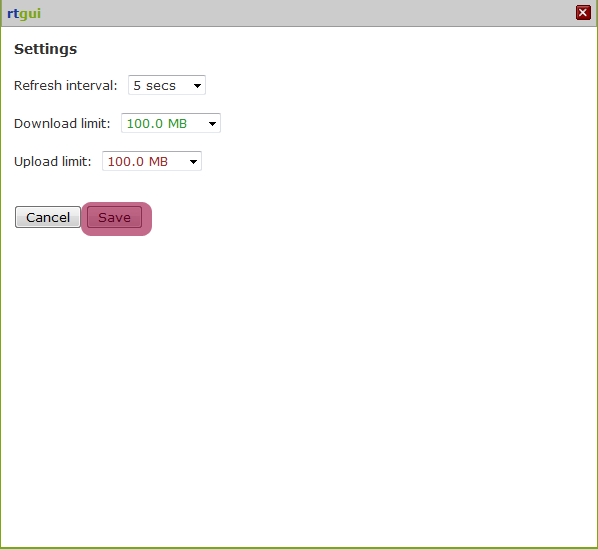
Hitting the Settings button will open up a new dialog box.
Again everything is nice and simple.
You may change the refresh interval and then hit Save
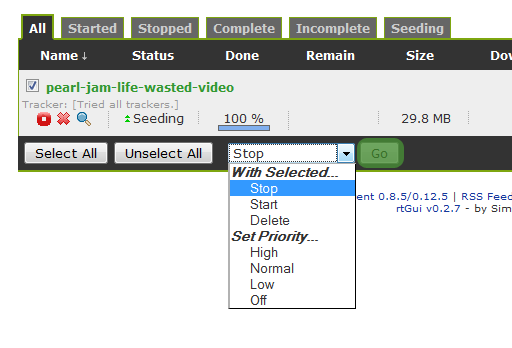
The same as we saw before in wTorrent you can select the checkbox next to each torrent to make changes to them simultaneously.
Once done hit Go.
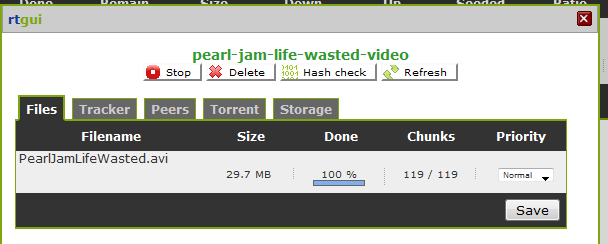
Click on the title of a torrent entry opens up a slightly more advanced section that involves only that specific torrent.
At the top are some straight-forward commands that the client will issue for that torrent when clicked.
In the Files tab you can see all the files in the torrent. You can change each individual file's priority here as well.
Tracker simply shows the tracker's it is connected to.
Peers shows the seeders and leechers in your swarm.
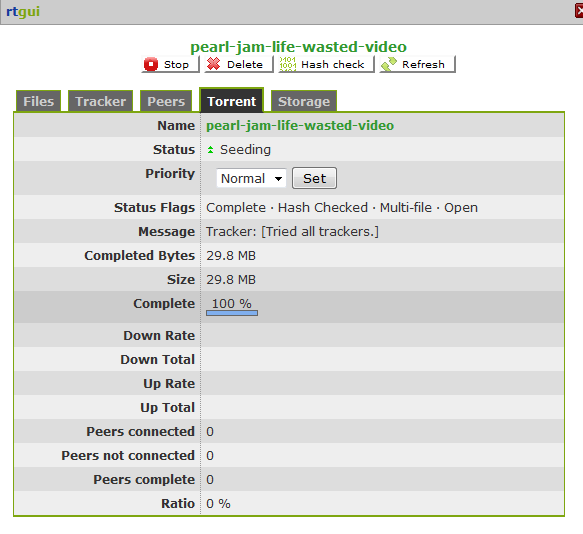
The Torrent tab is a bit more going on, it just tells you some quick information about the torrent and it's progress.
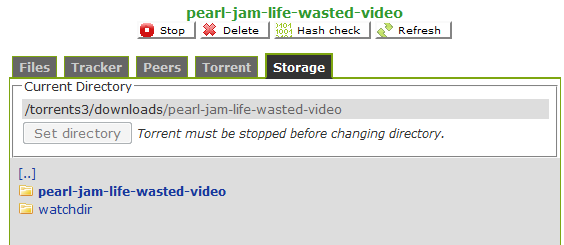
The Storage tab is likely the most useful tab, as it's not in either wTorrent or ruTorrent.
This feature allows you to change the directory which something is downloaded into.
Simply click on the directory and select Set Directory and your done.
Make sure the torrent is stopped first.
Extra Notes:
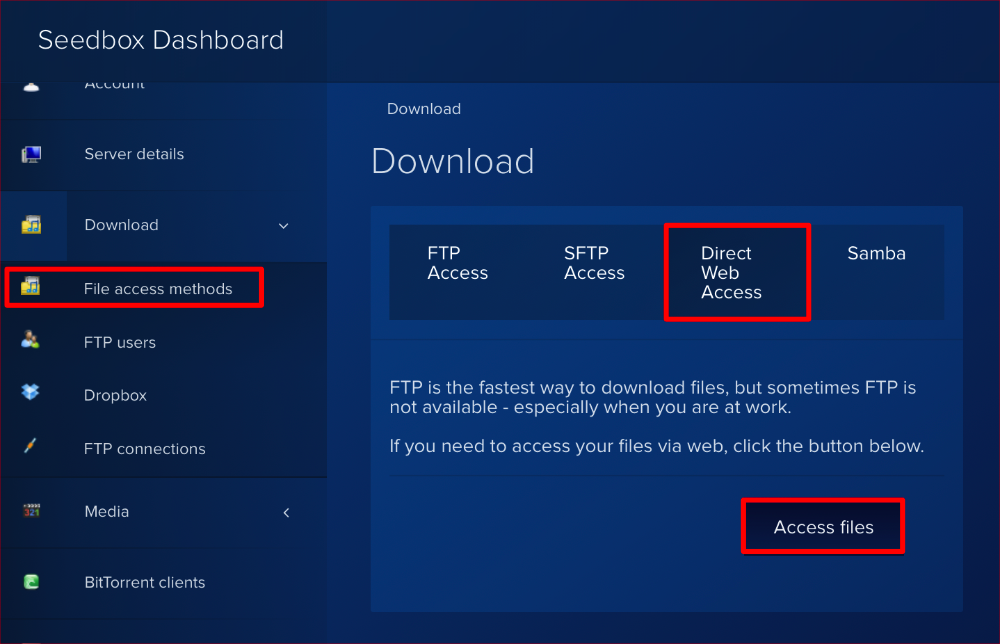
Apart from FTP you can also access and download your files by direct HTTP access.
Alernately you can just add “downloads” to the end of your server's URL. For example “http://semidedi.xirvik.com/downloads”.
It's simple just find your file, right click and Save Link/Target As.
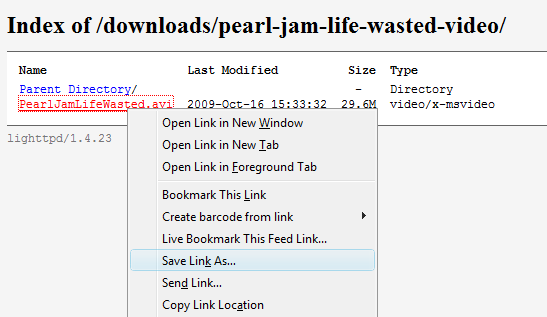
This method is only beneficial for downloading single files, though it may be convenient for you if you haven't learned about FTP.
If you'd like to learn more about using FTP (File Transfer Protocol) you can access our FTP tutorials here.
Finally if you ever run into a problem with your seedbox, you can go to the very bottom of your server's page and restart services selectively.
This is the end of tutorial.
We hope you have gained some knowledge and insight about the workings of rTorrent and your seedbox.
Thanks for choosing Xirvik.

